This is the room that we tend to spend most of our family time in. We relax here, it’s the room that has the most comfortable furniture and often a television. Perhaps this is the room you’re most likely to entertain in. However, it can be difficult to properly relax in an untidy living room.
The living room is also where a lot of clutter tends to accumulate, and it might need daily maintenance. Here, you can find out how to quickly blitz the living room in fifteen minutes for emergencies, as well as how to give the living room a deeper clean and keep it relatively tidy. A checklist for cleaning the living room can be found at the end of this post.

There may be affiliate links in this article. You can read more about this in my disclosure.
How to Blitz Your Living Room
This is something that often crops up and can cause some panic. Somebody is coming to visit, and you’ve only learnt about it half an hour before they turn up. In that time, you’ve got to blitz the place.
If you’ve only got fifteen minutes or less to clean the living room, it’s best to get your priorities in focus.
The first thing to sort out is clutter. Any cups or trash can go straight into the kitchen and out of the way. Other things should be straightened up and put in their proper place. Next, straighten out any cushions and rugs. Plumped up cushions can make a house look much more put together than it is.
If you have the time, run a duster over the worst of the flat surfaces in the room. Shiny black surfaces are the worst for dust, but you don’t have to be too fussy. Finally, light a nice smelling candle or use an air freshener to make the living room seem more livable.
Again, if you have a few minutes it definitely won’t hurt to run a vacuum cleaner through the room, even if you just vacuum around everything. Whatever you can do can have a huge effect in making the house look cleaner and make it easier for you to relax without worrying too much.
Remember, don’t panic. Most people don’t look too hard for imperfections, nor do they expect everyone to live in a show home. Just do what you can in the time to make the house look slightly presentable, and nobody will notice where your cleaning has fallen short.
Related: Best Bathroom Cleaning Hacks
Keeping the Living Room Tidy
If you’ve just cleaned your living room, it can be a bit disheartening when it becomes untidy again within a day or so. But usually you can keep the living room looking nice with in just a few minutes a day.
The simplest thing to do is just put things away when we’re not using them. This can be easier said than done though if you’re relaxed and especially if you’re not the only one in the house. However, it doesn’t take long to pick up the slack.
A lot of the principles of the living room blitz also apply here. Give things a quick dust each day and plump the cushions and straighten rugs to keep them looking nice.
It’s also best to keep the floor looking nice, either sweep or vacuum the floor at least every other day to stop dust and debris building up. If you have pets, children, or a fireplace, this is especially important.
Try to get your family involved. If you do have children, they can be very good little helpers for relatively simple tasks, depending on their age. A great way to do this, and to motivate yourself, is to make cleaning and tidying more fun.
Putting on some music can do wonders for helping you move about quickly, without concentrating on the chore of cleaning. However, don’t let yourself get distracted with the TV, or your phone.

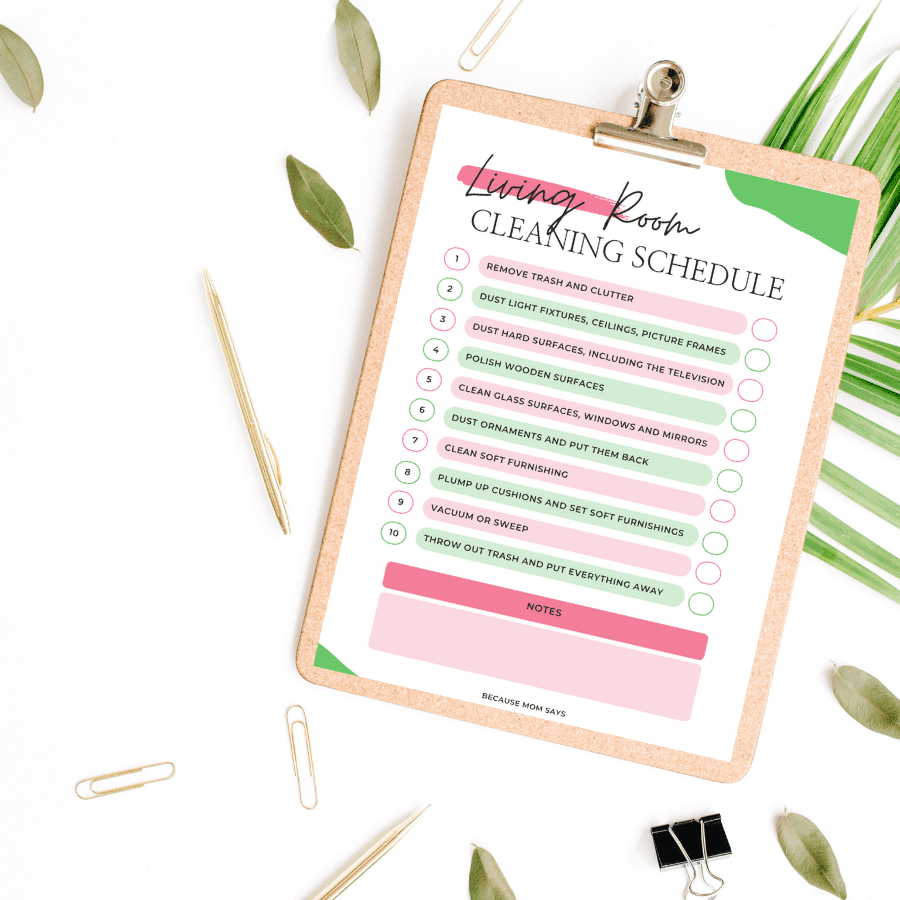
Gab your FREE living room cleaning checklist here
Tools for a Tidy Living Room
Unlike the kitchen or bathroom, your living room is unlikely to need much scrubbing. While it can get untidy very quickly, it usually won’t get dirty in the same way, unless something is spilt.
To help you keep your living room clean, there are a few things to keep in stock. Most households will have these already, so it’s ideal to keep them together.
First, you’ll want a duster. This can either be a telescopic duster, or microfiber cloths. Preferably, you’ll have both.
You’ll also want glass cleaner and furniture polish. Some leather also needs regular treatment with beeswax, so keep some around if this applies to you.
A vacuum cleaner or a broom, depending on your flooring and your preferred method of cleaning the floor.
Finally, it’s always good to have bags or boxes on hand, for either trash or clutter, respectively.
If you like things to smell nice, it might be good to keep an air freshener in your living room, or, if you prefer, scented candles.
When cleaning any room, it’s good to break it down into different steps. This means that rather than one big job, you have a bunch of smaller, more manageable jobs. These allow you to be able to react more easily to interruptions and pick up where you left off. It also makes the task of cleaning more manageable, as you know exactly what you need to do next.
The steps to deep cleaning the living room are below, there will be an abridged checklist for ease of printing afterwards.
Related: 10 Simple Steps to a Clean Bedroom
1: Get yourself organized first.
Make sure your equipment is on hand, so you don’t have to wander around looking for it. Next, clear out all the clutter in the room. If you have a wastebasket, put any trash in there. Anything that can be put away should be. Once you’ve tidied everything away, pick up small ornaments on your surfaces and put them on the floor, this will make it easier for you to dust.
2: It’s time to start dusting.
Start high, as always, and dust the ceiling corners, picture frames, and light fixtures with a telescopic duster. If you have curtains or blinds, don’t neglect them.
3: Dust hard surfaces
Now you want to move onto dusting the hard surfaces. Use a slightly damp microfiber cloth and work through the room, including the television set.
4: Polish wooden surfaces
Once every surface is dusted, you’ll want to polish whatever needs it. Wooden surfaces tend to work well with this. Use a dry, lint free cloth and not too much furniture polish.
5: Clean glass surfaces
Use the glass cleaner on the glass surfaces of the living room. This includes the windows, mirrors, picture fronts and anything else that would benefit.
Related: Top 10 Professional House Cleaning Hacks
6: Dust the ornaments and return them to their place
Return the ornaments to their rightful place, giving each one a quick going over with your dusting cloth as you do so.
7: Clean Soft Furnishing
Move onto the soft furnishings. Remove any cushions and throws from the seats. If your furniture suits it, run the upholstery attachment of your vacuum cleaner over the seating to remove any crumbs. Otherwise, use a dry cloth to brush the seating. If your seats are leather and require treating with wax, do so now.
8: Plump up cushions and straighten up furnishings
Plump the cushions and return them to the soft furnishings. Use this time to straighten up any throws and to make sure your furniture hasn’t moved out of place.
9: Clean the floors.
Either vacuum or sweep the floors, depending on which method you prefer. Make sure to vacuum rugs and to clean underneath them as well.
10: Finishing touches, throw out trash and put everything away
This is where you finish up. Empty the wastebasket or throw out the trash bag. Put your cleaning supplies away and give the room a spritz of air freshener or light a candle for a nice smell.
Congratulations, your living room is now ready to relax in. There’s something very satisfying about sitting in a tidy living room, it’s more comfortable when you aren’t focusing on the little things that need doing.
This cleaning routine should probably be fairly regular, on top of tidying up each day. If you can manage to finish every step of the list once a week, your living room should stay somewhere to be proud of.
Even if you can’t do the complete list every week, at least try to still keep on top of things. Just ten minutes each day and a regular vacuuming can make all the difference.

Gab your FREE living room cleaning checklist here


