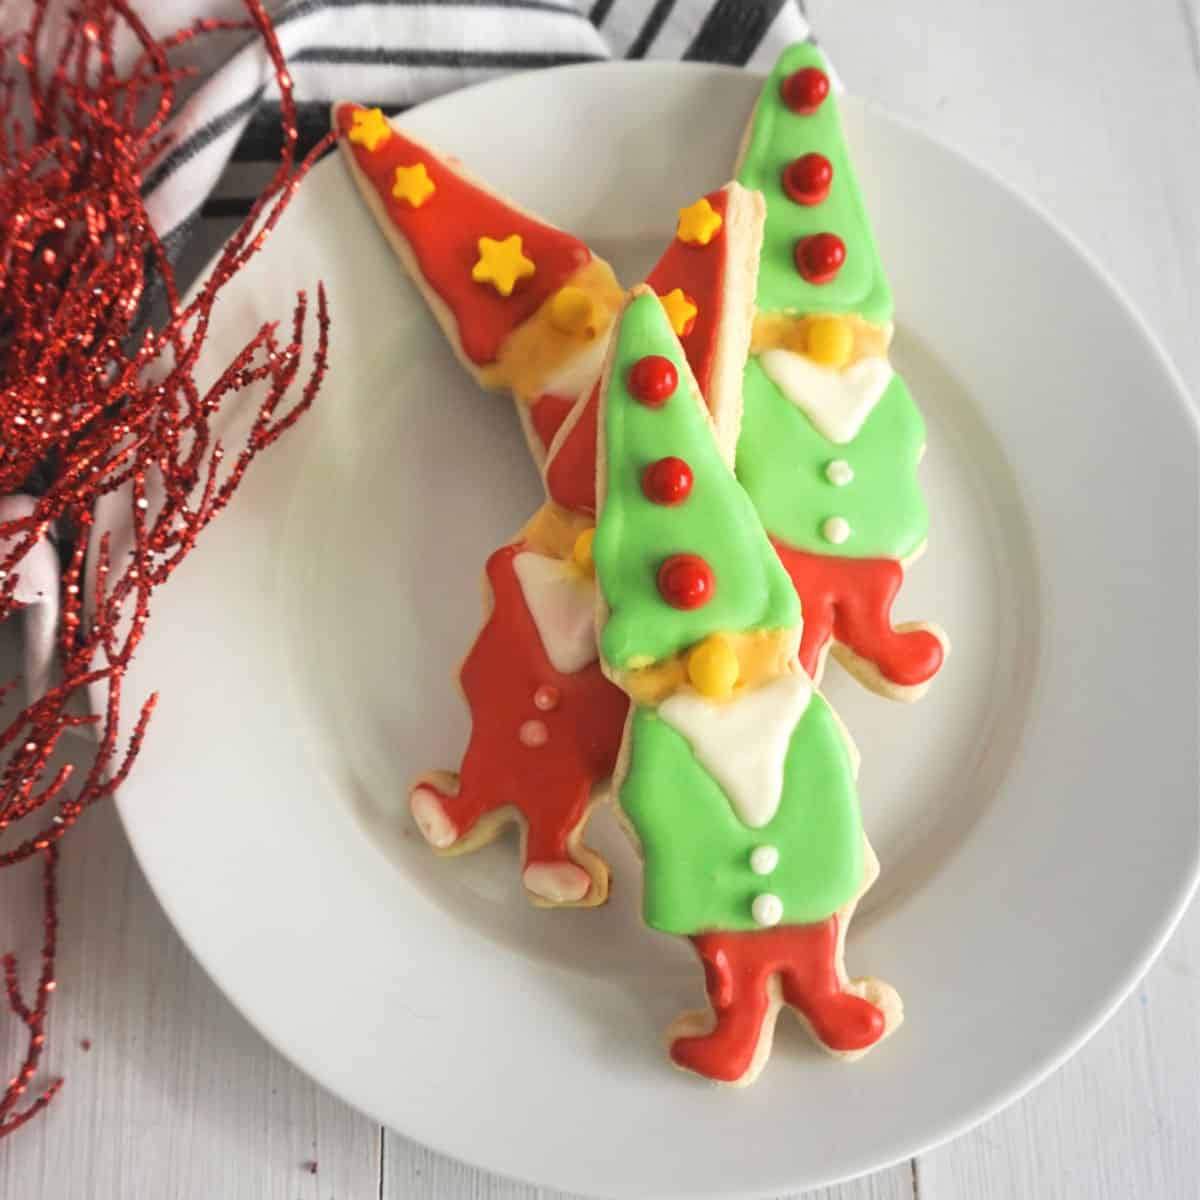
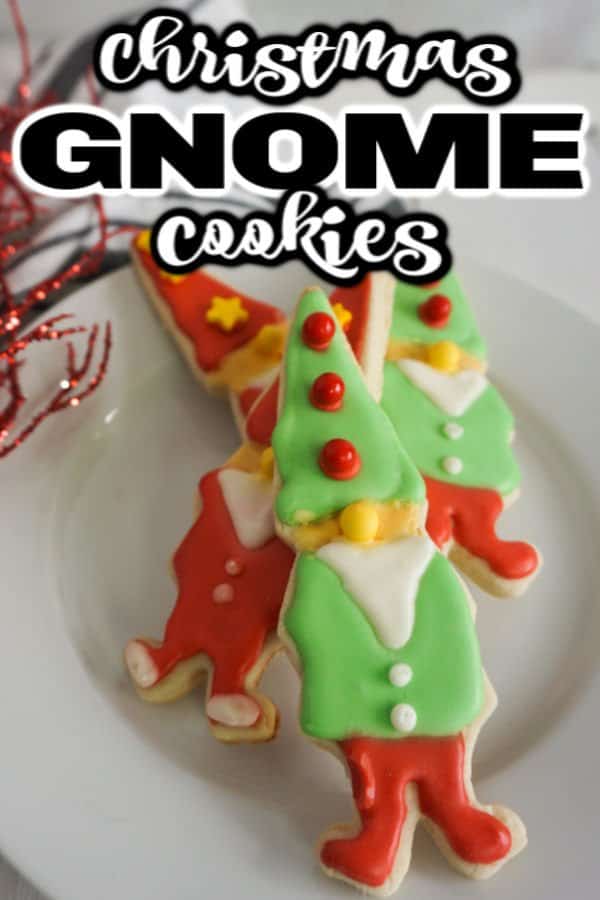
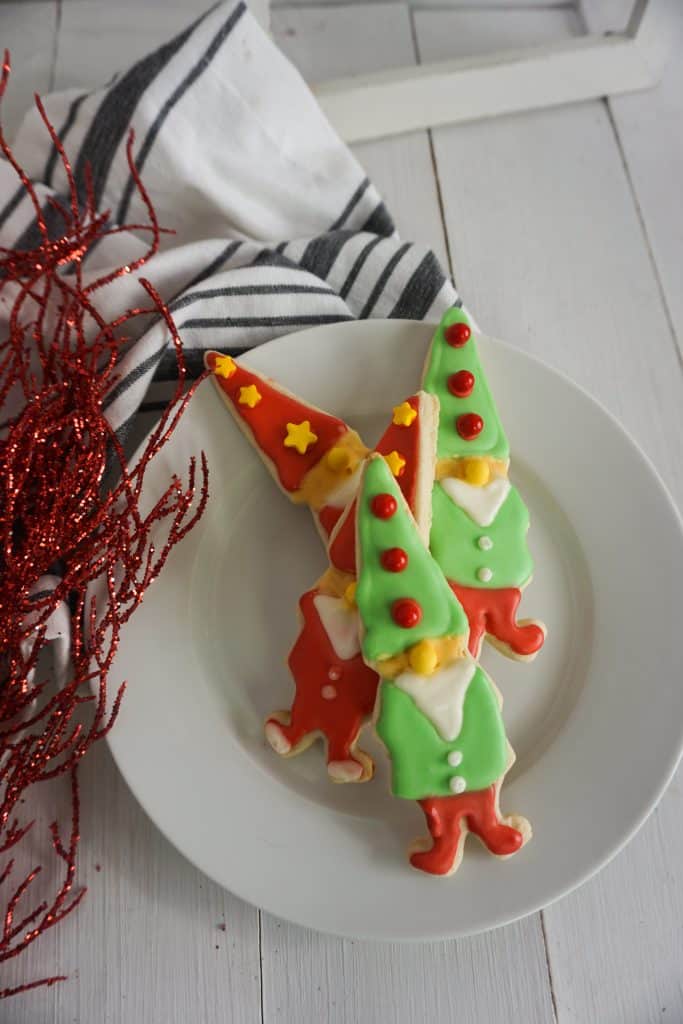
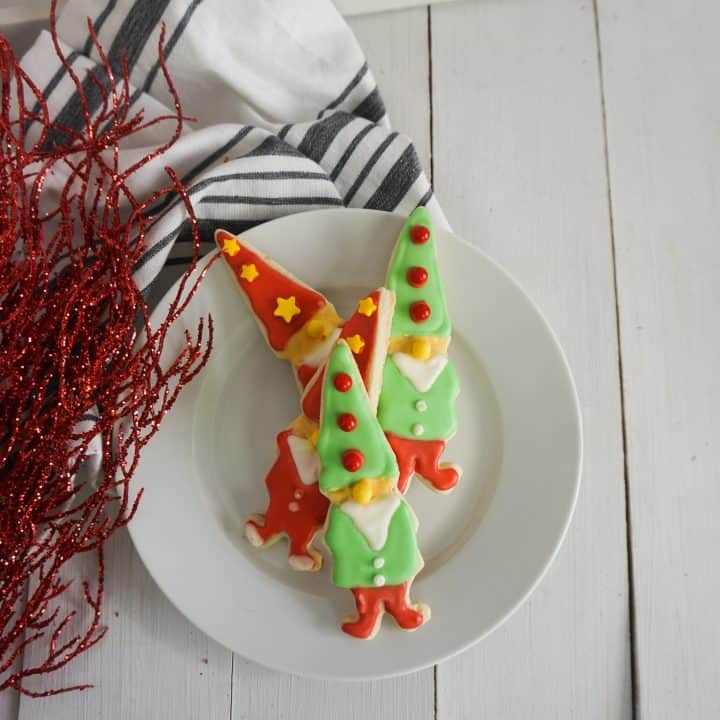
To say I’m a bit gnome obsessed is a little bit of an understatement. Everything about these Gnome cookies make me happy and I can’t wait to bite off their cute little heads over and over again. (Don’t judge – you’ll be doing it, too!)
Not only are they crazy cute, but they’re crazy good, too! If you love decorated Christmas cookies, you’ll love these Snowman Cookies too! They are simple to make and so fun to decorate.
Related: Crazy Cute Llama Cookies
There may be affiliate links in this article. You can read more about this in my disclosure.
Deliciously Adorable Gnome Cookies
We live in a world that is gnome obsessed. Gnomes are everywhere you look nowadays and honestly, I couldn’t be more happy about this.
I mean, seriously. What is there not to love? They’re the cutest little men, ever and they pack some seriously taste and flavor. While I truly enjoy baking up these cookies, I must admit that I love eating them even more.
Related: Brownie Cupcakes
What is the purpose of gnomes?
I think that this is an important question! Since we’re constantly seeing gnomes everywhere, don’t you want to know why? While most gnomes started out as lawn ornaments that were used as fun decoration, others believe that gnomes protect those who have them and use them from
Whatever their purpose, they’re always welcome in my house!
Are gnomes and dwarfs the same?
While they might have a lot of similarities, they’re not the same at all. Gnomes actually live underground while dwarfs live in a variety of different settings and aren’t just in one place. (both are mythical beings of course but it’s still so much fun to know the difference!)
How can I share this Christmas gnome recipe with others?
All you have to do to share these gnome cookies with others is bake up a batch and gift it to them. They’ll love the creativity and who doesn’t like to receive homemade goods?
And who knows, you just might make someones day by sharing these adorable Christmas gnomes with them!

Gnomes Cookies – The Top Christmas Cookies of the Year
Okay, this might just be my opinion…but let’s be real. Taking a bunch of these gnome cookies to the family get-together is going to go over way better than showing up with a bunch of oatmeal cookies, am I right?
If you want these to be the best Christmas cookies of the year, then you can totally make that happen! If you want them to be the best, then they’re going to be the best!
Related: Chocolate Chip French Toast Bake
How to make Gnome Cookies
The best part about these cookies is that they’re actually really easy to make. The decorating is going to take the longest so just make certain that you give yourself enough time to make that happen.
Ingredients needed to make these Christmas gnome cookies
Cookies
- 1 cup coconut oil, room temperature
- 2 eggs
- 1 cup sugar
- 1 1/2 tsp vanilla extract, clear
- 2 tspn baking powder
- 3 cups flour
Icing
- 6 cups powdered sugar
- 1/2 cup
aquafaba (or 2 egg whites) - 1/2 tsp vanilla extract
- Red gel food coloring
- Yellow gel food coloring
- Green gel food coloring
Related: Thanksgiving Cupcakes
Recipe to make these Gnome Cookies
Start by preheating your oven to 350 degrees.
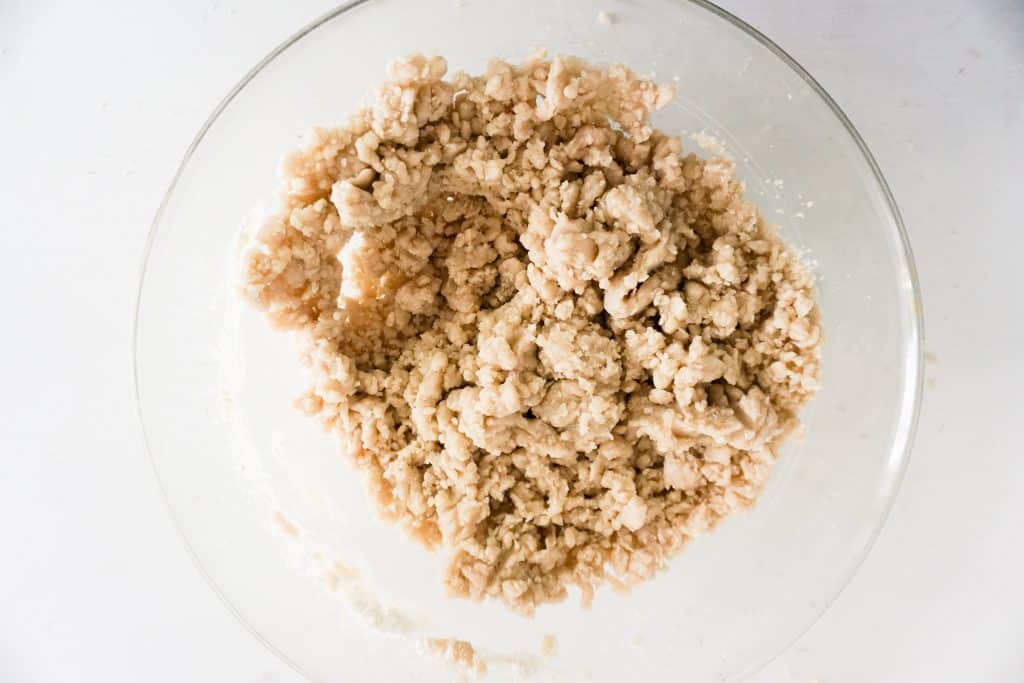
Take your oil and sugar and mix with your mixer, then add in aquafaba and vanilla extract. Mix together well and set aside.
Grab your flour and baking powder and whisk the two together in a totally separate bowl. Combine the mix
Keep in mind that the dough will look a bit crumbly at this point but just pour it out on parchment paper and work it. (The parchment paper is key!)
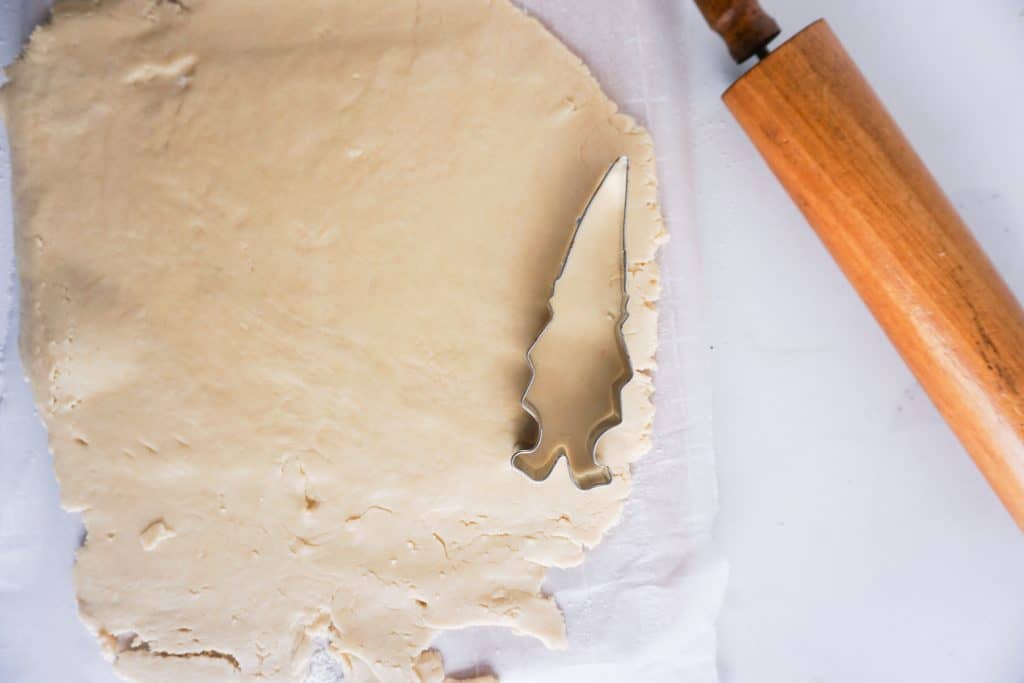
After working it, roll the dough to 1/4 inch thick. (no less than that or the cookies will break)
Use your gnome cookie cutter and start to cut out your cookies.
Once done, move the entire parchment paper with the cookies on it to your cookie sheet.
Bake your cookies in the oven for 10 minutes. Keep in mind that they will not brown at all so make certain to just pull them out at the 10-minute mark.
Leaving the cookies on the parchment paper, you’ll want to transfer them to a rack to cool. (They have to be
Icing Your Gnome Cookies
To make the icing, combine all of the icing ingredients and beat on low until smooth.
Take out about 1/3 of the icing in a second bowl and then set aside about 1/6 of the icing in another bowl. Then put the remaining 1/6 of the icing in a totally different bowl as that will not be colored at all.
Grab your largest portion of icing and add in about 5 drops of your red food coloring and stir.
With the smaller bowl of icing, add about 9 drops of green food coloring and stir. Put the green icing in a container with a lid and set aside for later.
Take another small portion of the icing and add about 4 drops of yellow and 1 drop of red food coloring and stir. You’re trying to create a peach color. Once happy with it, put in an airtight container with a lid and set aside.
Grab your red icing and put it in a decorating bag with a small round tip.
Pipe an edge line all around the outer edge of every cookie to be where the gnome hat or shirt/pants are to be and then fill it in. Don’t forget to leave space for a beard!
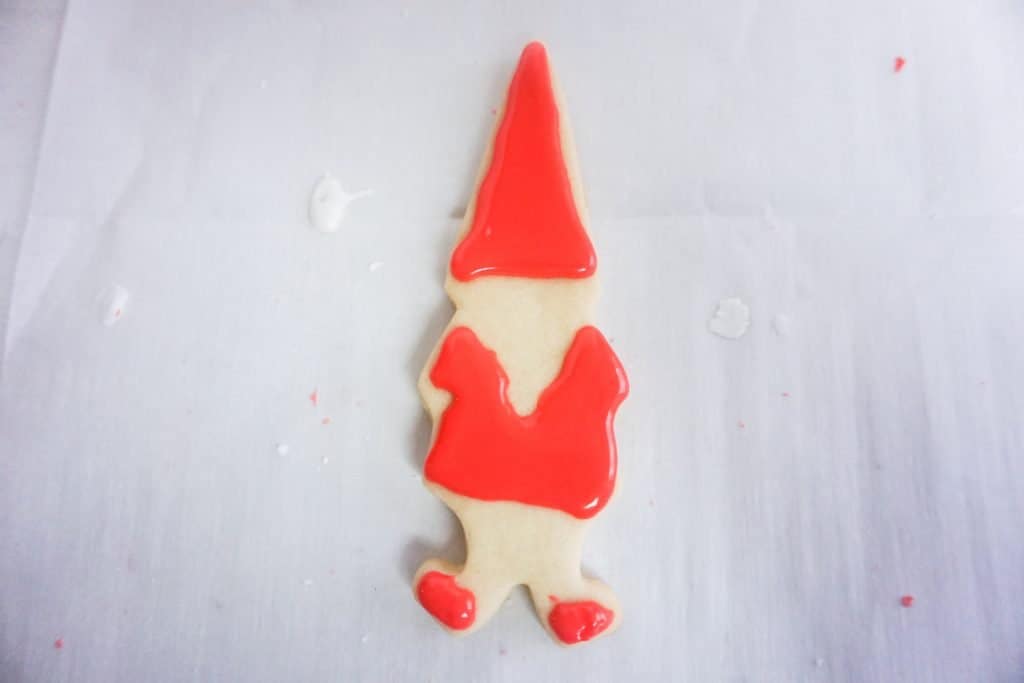
Let this portion of the icing dry for 2-3 hours.
Take your green icing, pipe an outline of the other pieces of clothing that you’re wanting to be green. Fill it in as well.
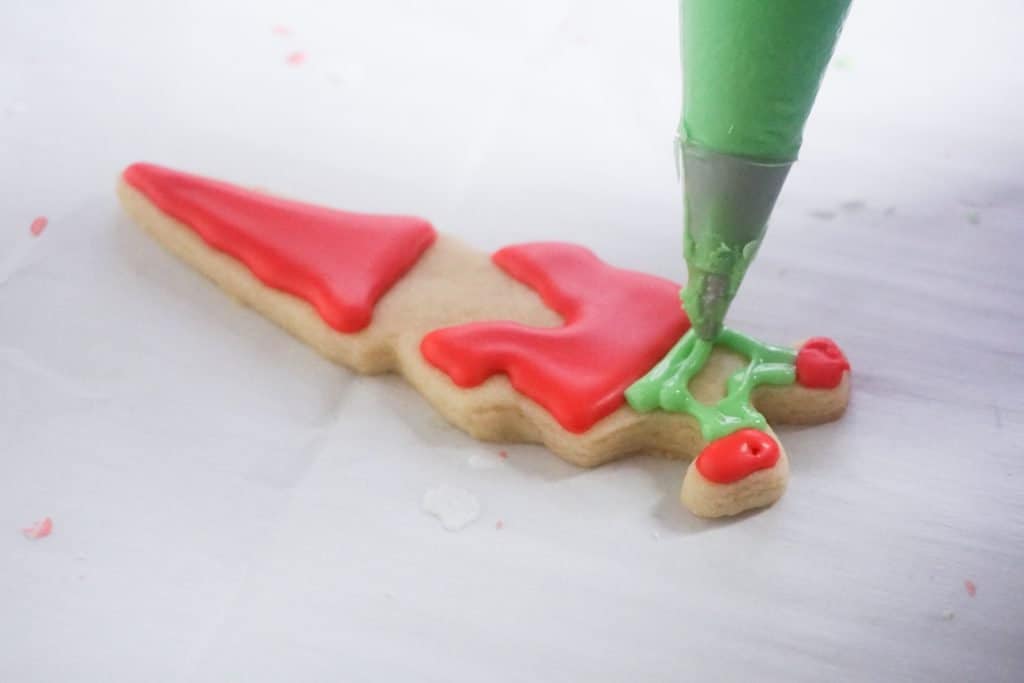
Let this portion of the icing dry for 2-3 hours.
Take your white icing, trace out an outline for the beard and fill it in.
Let this portion of the icing dry for 2-3 hours.
Take your peach icing, and fill in the area for the face. Add a sprinkle ball in the middle for his nose.
With your red icing, put some dots on the hat and them put on a ball or sprinkle in it as well.
Let this layer of icing dry for 2-3 hours.
Enjoy!
Gnome Cookies
These Gnome Cookies are just too cute to pass up!
Ingredients
- 1 cup coconut oil, room temperature
- 2 eggs
- 1 cup of sugar
- 1 1/2 tsp vanilla extract, clear
- 2 tsp baking powder
- 3 cups flour
- 6 cups powdered sugar
- 2 egg whites
- 1/2 tsp vanilla extract
- Red gel food coloring
- Yellow gel food coloring
- Green gel food coloring
Instructions
Start by preheating your oven to 350 degrees.
Take your oil and sugar and mix with your mixer, then add in aquafaba and vanilla extract. Mix together well and set aside.
Grab your flour and baking powder and whisk the two together in a totally separate bowl. Combine the mixture with the sugar/butter mixture by doing so in 1/3 increments.
Keep in mind that the dough will look a bit crumbly at this point but just pour it out on parchment paper and work it. (The parchment paper is key!)
After working it, roll the dough to 1/4 inch thick. (no less than that or the cookies will break)
Use your gnome cookie cutter and start to cut out your cookies.
Once done, move the entire parchment paper with the cookies on it to your cookie sheet.
Bake your cookies in the oven for 10 minutes. Keep in mind that they will not brown at all so make certain to just pull them out at the 10-minute mark.
Leaving the cookies on the parchment paper, you'll want to transfer them to a rack to cool. (They have to be completely cool to frost.)
To make the icing, combine all of the icing ingredients and beat on low until smooth.
Take out about 1/3 of the icing in a second bowl and then set aside about 1/6 of the icing in another bowl. Then put the remaining 1/6 of the icing in a totally different bowl as that will not be colored at all.
Grab your largest portion of icing and add in about 5 drops of your red food coloring and stir.
With the smaller bowl of icing, add about 9 drops of green food coloring and stir. Put the green icing in a container with a lid and set aside for later.
Take another small portion of the icing and add about 4 drops of yellow and 1 drop of red food coloring and stir. You're trying to create a peach color. Once happy with it, put in an airtight container with a lid and set aside.
Grab your red icing and put it in a decorating bag with a small round tip.
Pipe an edge line all around the outer edge of every cookie to be where the gnome hat or shirt/pants are to be and then fill it in. Don't forget to leave space for a beard!
Let this portion of the icing dry for 2-3 hours.
Take your green icing, pipe an outline of the other pieces of clothing that you're wanting to be green. Fill it in as well.
Let this portion of the icing dry for 2-3 hours.
Take your white icing, trace out an outline for the beard and fill it in.
Let this portion of the icing dry for 2-3 hours.
Take your peach icing, and fill in the area for the face. Add a sprinkle ball in the middle for his nose.
With your red icing, put some dots on the hat and them put on a ball or sprinkle in it as well.
Let this layer of icing dry for 2-3 hours.
Enjoy!
Recommended Products
As an Amazon Associate and member of other affiliate programs, I earn from qualifying purchases.


Nutrition Information
Yield 12 Serving Size 1Amount Per Serving Calories 571Total Fat 19gSaturated Fat 15gTrans Fat 0gUnsaturated Fat 2gCholesterol 31mgSodium 104mgCarbohydrates 96gFiber 1gSugar 71gProtein 5g
Farah Zeb is a mother of five, including two children with special needs. She shares practical parenting tips and resources to help other families navigate daily challenges and create supportive, nurturing environments.


 Skip to Recipe
1 thought on “Deliciously Adorable Gnome Cookies”
Pingback: Blueberry Fudge - Because Mom Says